As a kid, I adored 3-D projects. I spent hours making pop-up books and cards. In the classroom, often times, teachers overlook how easy it is to make art POP even with simple paper. Rather then merely gluing paper to paper, we used a few paper techniques to create texture, an important element of art for kids of all ages to learn!
This post is a part of our series over the next two weeks:
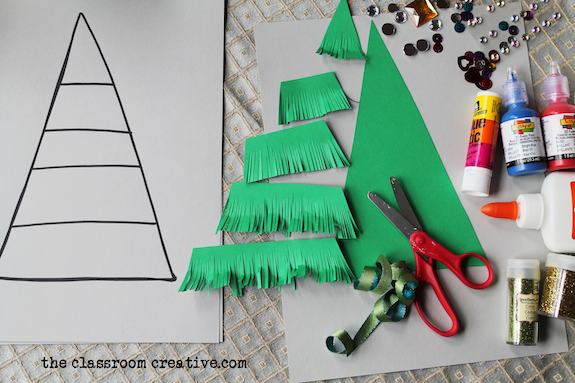
- Our Christmas Tree Template (2 copies) printed on green cardstock
- colored cardstock (construction paper doesn’t have the same weight)- in green, grey, and other colors for the decorations
- scissors
- glue and gluesticks
- rhinestones, gems, sequins, puffy paint…whatever mediums you want to decorate!
Download the templates here:
1.) Give a brief lesson that texture is the way a surface feels OR when drawing, how we think a surface should feel. In this case, students will be working with materials to give their final products texture.
2.) Have student cut out both triangles. One triangle has five slits, the other is plain for the background.
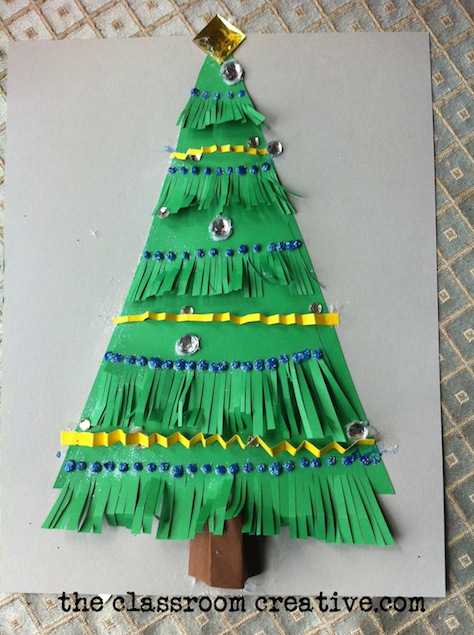
3.) In the five piece triangle, students should snip the lower half of the strip of green cardstock to mimic the texture of pine needles. The top half of the strip is glued, and basically, these five pieces fit like a puzzle.
4.) Then, decorate! We also made “garland” with accordion folded paper strips. We used rhinestones, puffy paint, glitter, and gems for our “ornaments”.
The tree fun doesn’t have to end! We have a science study on the evergreen tree over HERE! Plus a Christmas life cycle and writing activity over HERE!
Hope you find time to craft over the next two weeks!
Stay connected with us at The Classroom Creative:
Happy Holidays!
Nicolette



[…] to work on your child’s fine motor skills by hopping over to see our Christmas tree textured craft. We even have a fine motor craft for spring. Both are worth pinning for later! Stay tuned for […]